Strategy guide · 5 min read
Stack Yard guide: read each load's rule before you let go
How Stack Yard's four landing rules, the perfect window, streak scoring and crane speed work, with a plan for building taller stacks and longer runs.

Updated 29 September 2026 · How we write guides
 Stack YardTap to drop. Stack the yard as high as you dare.Play free
How a run works
Every run starts on an empty shipping container, and the stack's top is simply the part of the last load that the next one can stand on. The container is about three crates wide, but the first crate you drop is narrower than it, so the stack immediately shrinks to that crate's width. From then on, every drop either keeps that width, loses some of it, or wins some back. The run ends on the first load that falls.
Each new load enters from one edge of the crane's travel, never from where you dropped the last one, and moves towards the middle at a steady speed. The trolley travels up to 200 units either side of the stack's centre, so at the starting speed of 150 units per second it takes roughly 1.3 seconds to reach the middle on its first pass. Because the speed is steady rather than a pendulum swing, the moment it crosses the centre is identical on every pass, and that is what you are learning to time.
The four landing rules
Nothing is simulated with physics. The outcome is decided the instant you release, by one short rule per kind of load.
| Load | Width (units) | Stays if... | New top after landing |
|---|---|---|---|
| Crate | 72 to 90 | at least 12 units of it overlap the top | only the overlapping part |
| Pallet | about 142 | its middle is over the top | the whole pallet |
| Barrel | about 70 | its middle is within a quarter of the top's width of centre (never tighter than the perfect window) | the crest only, about 70% of the barrel |
| Tall crate | about 79 | no more than a third of it hangs over one side | the whole tall crate |
Two things in that table are easy to miss. First, the pallet and the tall crate are both never cut, so either of them can make your stack wider than it was before. A tall crate landed on a 50-unit top leaves a 79-unit top. Second, the barrel always leaves a top of roughly 50 units even when you land it perfectly, so a barrel is a width tax you pay every time one appears.
Perfects and the streak
A drop within 7 units of the top's centre is a perfect. The load snaps to dead centre, so a perfect crate is never sliced unless it is wider than the top beneath it. Scoring climbs with the streak:
- A normal drop scores 1 and resets the streak.
- The first perfect scores 2, the second 3, the third 4.
- Every perfect after that scores 5, the cap.
From the third perfect in a row, each perfect also gives back 10 units on both sides, up to the full width of the load you just dropped. On a crate this un-slices the part that would have been cut; on a barrel it widens the crest up to the barrel's full width. The label above the stack shows the streak count once it reaches three.
A streak both multiplies your score by up to five and repairs a narrow stack, so a sloppy but safe drop costs far more than the point it earns.
What the dealer will and will not give you
The first three loads are always crates. Pallets can appear from the 4th, barrels from the 6th and tall crates from the 8th. Crates are the most common by a wide margin; the rough weights are crate 50, tall crate 18, barrel 17 and pallet 13 once everything is unlocked.
The dealer also refuses to hand you a pallet, barrel or tall crate unless its safe band reaches at least 16 units either side of centre on the current top. That produces some useful patterns:
- A barrel is never followed by another barrel, and a pallet never by another pallet.
- After a normal barrel the top is too narrow for a tall crate, so the next load will be a crate or a pallet.
- If your stack is very thin, you will mostly see crates, because the wider loads need room to be fair.
Opening plan
- Spend the first three crates learning the centre crossing. Drop on the first pass that reaches the middle rather than waiting a full lap.
- Treat the first crate as the one that sets your width. A clean perfect here leaves the full crate width to work with.
- When the first pallet arrives, relax: anywhere its middle is over the stack is safe, and a perfect on it still extends the streak.
Mid-run strategy
The crane gets 3 units per second faster for every load landed and 1 unit per second faster for every second that passes, up to 420. At the cap it reaches the middle in under half a second from the edge. The perfect window stays 14 units wide at every speed, so perfects remain possible; they just need earlier, more committed taps.
- Go on the first crossing. Waiting a full lap makes the crane slightly faster and gives you no new information, because every pass crosses the centre at the same moment.
- Use the tint on barrels and tall crates. While one hangs on the hook, the band its middle can safely land in is tinted on the stack. On a barrel that band can be narrow; on a tall crate the middle must be at least about 13 units inside the edge.
- Spend pallets and tall crates on repairs. If crates have trimmed you down, a centred pallet or tall crate restores a wide top in one drop.
- Expect the barrel squeeze. Plan the crate after a barrel as the hardest drop of the sequence.
Common mistakes
- Holding too long. After five seconds the load drops wherever it is, and a red ring drains on the hook for the last three seconds as a warning.
- Treating the barrel like a crate. A crate can overhang a long way and survive; a barrel off-centre by a quarter of the top rolls away.
If you're stuck
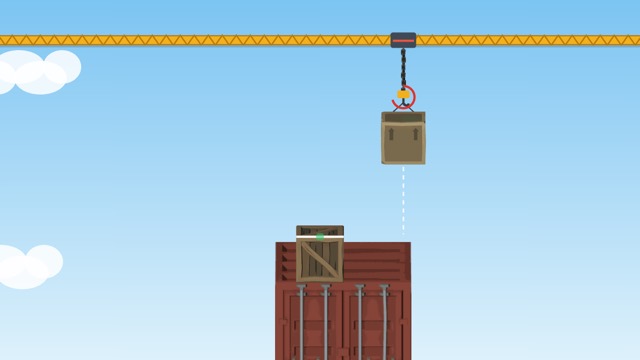
Watch the green pip in the middle of the stack's top: it lights while the load is inside the perfect window. Play a few runs aiming only to light it, ignoring score. Once your first three crates are consistently perfect, the streak bonus starts widening the stack, and runs get noticeably longer because the later, faster loads land on a broader target.
Ready to try it?Stack Yard is free and runs in your browser.Play now