Strategy guide · 5 min read
Run and Gun guide: guns, armour, bosses and scrap
A deeper Run and Gun guide: how armour changes which gun to use, how sectors scale, when to call the air strike, and what to buy first in the Armory.

Updated 29 September 2026 · How we write guides
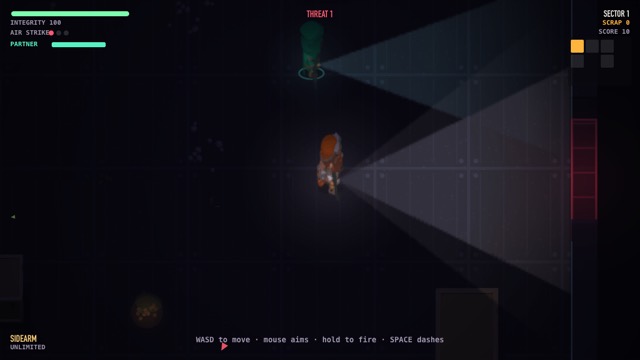 Run and GunClear the room. Shoot the door open. Take what was behind it.Play free
How a run is put together
Each sector is a small floor plan of rooms, starting at five rooms on sector 1 and growing by one every two sectors, up to ten. Apart from the entrance and the exit, each room is one of three kinds:
- Combat rooms, the most common, throw one or more waves at you. A second wave becomes likelier the deeper you go, and from sector 6 a third can follow.
- Hold rooms (about one in five) lock you in for a countdown of 8 seconds plus 5.5 per wave. Waves keep spawning on a timer, and the room only opens once the clock is out and the last monster is dead.
- Cache rooms (about one in six) have no enemies and always contain a weapon crate.
Around four in ten doors between rooms are welded shut, never the ones leading out of the entrance. A welded door has 130 health plus 26 per sector, so it gets tougher right alongside the monsters.
Clearing a room drops scrap, a 50% chance of a health pickup worth 26, and a chance at a weapon crate: 45% in a combat room, 90% in a hold room, and guaranteed in the first room you clear each run. Hold rooms also pay a much bigger scrap reward, so they are worth the danger.
Armour is the rule that decides your gun
Every hit on an armoured enemy loses a flat amount, and each hit always deals at least 2 damage. That makes fast, light guns weak against heavy targets.
| Target | Armour |
|---|---|
| Brute | 4 |
| Rootwarden | 5 |
| Warden | 6 |
| Plated elite | +6 on top of its own |
The Ripper fires 8-damage bullets, so against the Warden each round does only 2. The Railspike's 52-damage slug barely notices the same armour, and it pierces up to six targets. A good rule: use rapid fire on swarms of light monsters, and use the Railspike, Thumper or Scattergun at close range on anything armoured.
The guns, in numbers
| Gun | Damage per shot | Ammo | Special |
|---|---|---|---|
| Sidearm | 16 | Unlimited | Reliable, about 107 damage a second |
| Scattergun | 8 pellets of 11 | 28 | Huge knockback, very short reach |
| Ripper | 8 | 210 | Very fast fire, wide spread |
| Railspike | 52 | 24 | Pierces 6, long range |
| Thumper | 22 plus a 66-damage blast | 16 | Lobbed charge |
| Arc Coil | 21 | 70 | Jumps to 3 more enemies nearby |
Picking up a crate of the gun you are already holding adds its ammo on top, up to double a full load. Picking up a different gun swaps immediately. When a gun runs dry you drop back to the sidearm. Explosions from the Thumper and the air strike never damage you, only enemies, crates and doors.
Air strike and dash
The air strike lands 1.05 seconds after you call it, where your cursor is, or 300 units in front of you on touch. It drops ten bombs scattered across a wide circle, each worth 96 damage plus 6 per sector at its centre. Explosions deal more than double damage to welded doors, so a strike can also clear a door when you are under pressure. You gain one strike per sector cleared.
The dash is a 0.17-second burst with a short window where you cannot be hurt. Its cooldown is 1.05 seconds. Use it to cross a painted lane or ring, not to reposition casually, so it is ready when a swooper or roller commits.
Reading the monsters
- Swoopers circle and then fly straight down a marked lane. Step sideways out of the lane.
- Rollers paint a lane and roll down it. If they hit a wall or solid cover they stop and are stunned for almost a second, which is a free window to shoot.
- Hexcallers throw a fan of three slow orbs and call two swoopers every eight seconds. Kill them early.
- Whirlers take half damage from bullets while spinning, then stagger dizzy for about a second, taking 50% extra. Back off during the spin, punish the stagger.
- Volatile elites burst a short time after death. Step away from the body.
From sector 2, elites begin to appear: 5% of spawns at first, rising 3% a sector to a 30% cap. They have 2.3 times the health and pay three times the scrap.
How difficulty climbs
Monsters gain 22% health and 12% damage per sector, and 3% speed per sector up to +50%. New types join the pool by sector: rollers and spitters from 2, Hexcallers from 3, brutes and Whirlers from 4. Every third sector ends in a boss in the exit room: the Warden on 3, 9 and 15, the Rootwarden on 6 and 12.
Clearing a sector gives you an air strike, heals 35% of your maximum integrity, revives or fully heals your partner, and offers three perks from a pool of eleven.
Perks worth taking
- Strike Rig gives an air strike now and an extra one every sector. It compounds.
- Field Kit heals 18 per room cleared, which adds up over a ten-room sector.
- Hollow Point (+14% damage) and Vented Barrel (+12% fire rate) are safe picks at any time.
- Kinetic Rounds doubles your damage to doors and crates. It is strong early and weak later.
- Buddy Stims makes revives twice as fast and at full health, if you lean on your partner.
Spending scrap in the Armory
Scrap is only banked when the run ends, including when you quit from pause. Guns you unlock start appearing in crates. Crates pick twice from your unlocked guns and lean towards the later one, so each new unlock shows up often.
| Upgrade | First level | Levels |
|---|---|---|
| Reinforced Frame (+20 integrity) | 120 | 5 |
| Deep Pouches (+15% crate ammo) | 110 | 4 |
| Servo Legs (+4% speed) | 130 | 4 |
| Partner Kit | 150 | 4 |
| Machined Rounds (+6% damage) | 160 | 5 |
| Strike Uplink (+1 strike per run) | 320 | 3 |
Each level costs more than the one before. A sensible order is one or two levels of Reinforced Frame, then the Ripper at 300 so crates are not all Scatterguns, then the Railspike at 700 for doors and bosses.
If you're stuck
- Dying before sector 3: buy Reinforced Frame levels and fight from the sidearm's range instead of chasing.
- Dying to bosses: save at least two air strikes for the exit room and bring a Railspike or Thumper.
- Out of ammo constantly: Deep Pouches and the Drum Feed perk both raise crate ammo.
Ready to try it?Run and Gun is free and runs in your browser.Play now