Strategy guide · 5 min read
Prism Sort guide: solve cleaner boards in fewer pours
How Prism Sort's pour rule, par and one-spare levels really work, with a step-by-step method for untangling boards and a plan for spending coins.

Updated 29 September 2026 · How we write guides
 Prism SortPour the light until every prism holds one colour.Play free
How a level is built
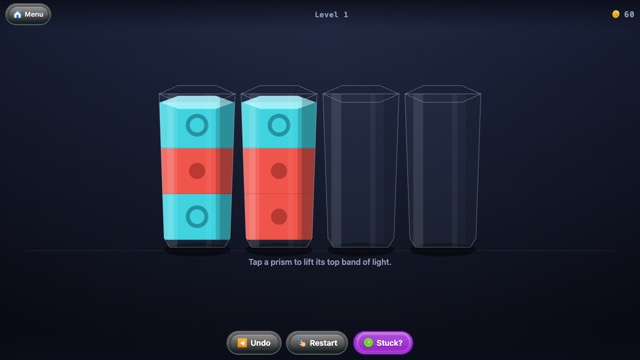
Every level is a set of glass prisms. Most start full and shuffled, and a few start empty; those are your spares. The number of prisms is always the number of colours plus the number of spares. In the first two levels each prism holds three bands of light; from level three on, every prism holds four.
Boards are generated from the level number, so level 14 is the same board for every player. Before you ever see a board, the game's own solver has solved it or built it backwards from a finished position. You are never looking at a board that cannot be finished, only one you have not finished yet.
The pour rule, precisely
- You lift the whole top run of one colour, however many bands deep it is.
- It can land only in an empty prism or on top of the same colour.
- If the target does not have room for the whole run, the part that fits moves across and the rest stays behind.
- A level ends the moment every prism is either empty or completely full of a single colour.
The last point matters: a prism holding three rose bands out of four is not finished. You need the fourth rose on it before the level can end.
Par, and how to read a board
Par is worked out from a simple count. Look at each prism from bottom to top and count the runs, where a run is a stretch of the same colour. Add the runs across all prisms, then subtract the number of colours. That figure is the fewest pours the board could possibly need, because every pour can merge at most one run into another. Par is that figure plus two.
You can use the same count as you play. A pour that moves a whole run onto its own colour lowers the count by one; a partial pour does not. A pour that puts a run into an empty prism does not lower it at all; it only buys room. So the pours that move you towards par are the joins, and every move into an empty prism is an investment you will need to pay back.
What a solve pays
| Result | Coins |
|---|---|
| Any solve | 12 |
| No assist used on this level | +8 |
| Finished at or under par | +6 |
| Best possible solve | 26 |
You start with 60 coins. The three assists cost 25 for a hint, 30 for a rewind and 40 for an extra prism. Any assist removes the no-assist bonus for that level, and restarting does not bring it back. Undo and Restart, on the other hand, are free, and undo takes the pour off your move count, so exploring never hurts your par bonus.
A method that works on most boards
- Scan for colours that are already on top of two prisms. Joining those is a free win: it lowers the run count without using space.
- Before using a spare, ask what goes back out of it. Pour into an empty prism only when the run you are moving is buried colour that blocks something useful underneath.
- Prefer pours that empty a prism completely. An emptied prism is a new spare.
- Finish prisms when you can. A prism that holds four bands of one colour is done and never needs touching again.
- Avoid starting a colour in an empty prism when that colour is already showing on top of another prism. You will usually end up with it split in two places.
These are the same priorities the game's own solver uses when it checks a board, in the same order: finish a prism, empty a prism, and do not open a fresh prism while a matching colour is visible.
The level ramp
Levels one to eleven all have two spare prisms, and colours are added about every other level, from two colours at level one to seven at level eleven. After that, the game alternates between adding colours and taking a spare away:
| Level | Colours | Spares |
|---|---|---|
| 12 | 6 | 1 |
| 14 | 7 | 1 |
| 17 | 8 | 1 |
| 20 | 9 | 1 |
| 23 | 10 | 1 |
| 26 | 11 | 1 |
| 29 | 12 | 1 |
Notice that the one-spare levels often have fewer colours than the level before them. Do not be fooled by that: with only one empty prism you cannot park two runs at once, so the order of pours matters far more. Level 30 brings back twelve colours with two spares, and past level 30 the game rotates between twelve colours with two spares and eleven or twelve with one.
One-spare boards
On a board with a single spare, treat the empty prism as a loan. Before you fill it, you should be able to name the pour that will clear it again. Good candidates to put in the spare are runs whose colour is two or three bands deep elsewhere, because you will soon uncover somewhere for them to go. Bad candidates are single bands of a colour that is buried at the bottom of several prisms.
If the game says no pour is possible, you are at a dead end. It is not a loss; undo steps back one pour at a time for free.
Spending coins well
- Rewind (30) is the best value when the board has gone wrong. When the position can no longer be solved, it steps back, up to 14 pours, to the most recent point where it can. When the board is still solvable it simply undoes five pours.
- Hint (25) lights one prism to lift from and one to pour into, taken from a real solution. If no solution exists from where you are, the hint card is greyed out and nothing is charged.
- Extra prism (40) adds an empty prism and can be bought only once per level. It stays for the rest of that level, even if you restart. It is the strongest assist on one-spare levels.
If you're stuck
- Press Stuck? (or H). The panel tells you whether the board can still be solved from your current position before you spend anything.
- If it cannot, undo pours one at a time until it can, or restart. Both are free.
- On a keyboard, number keys 1 to 9 select prisms, Z or Backspace undoes, and R restarts.
- Leave a hard level and come back. The board you left, with its move history, is saved in your browser.
Ready to try it?Prism Sort is free and runs in your browser.Play now