Strategy guide · 5 min read
Corridor Vault guide: spend light on purpose, bank at the right time
Lamp budgets for every Corridor Vault depth, where keys and oil are placed, what each vault pays, and when to go deeper or leave with your coins.

Updated 29 September 2026 · How we write guides
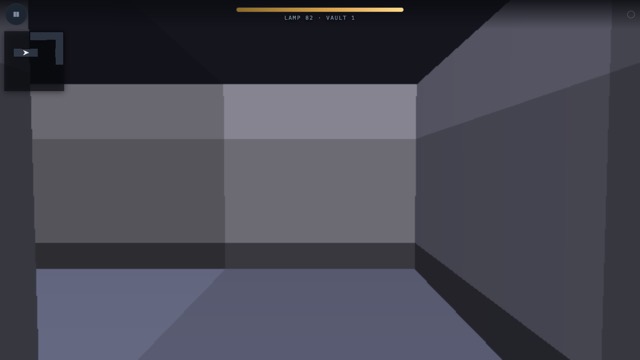 Corridor VaultThe key is down the branch you did not take.Play free
How a run works
A run is a chain of vaults. Each vault is a new maze: you start in a corner, find the keys for its locked doors, and reach the landing. At the landing you choose to go deeper or leave. Only leaving from a landing adds the coins you are carrying to your bank. If the lamp runs out, or you end the run from the pause menu in the middle of a vault, those coins are lost and the next run starts again at vault 1.
The lamp in numbers
Every step costs one unit of lamp, forward or backward. Turning and standing still cost nothing. Each new vault starts with a full lamp, and its size grows with the maze:
| Vault | Maze | Doors | Oil flasks | Full lamp |
|---|---|---|---|---|
| 1 | 7 x 7 | 1 | 1 | 82 |
| 2 | 7 x 7 | 1 | 2 | 85 |
| 3 | 9 x 9 | 1 | 2 | 106 |
| 4 | 9 x 9 | 2 | 3 | 109 |
| 5 | 11 x 11 | 2 | 3 | 134 |
| 6 | 11 x 11 | 2 | 4 | 137 |
| 7 | 13 x 13 | 3 | 4 | 166 |
| 8 | 13 x 13 | 3 | 4 | 169 |
After vault 8 the maze stays 13 x 13 with three doors and four flasks. The lamp grows by 3 per vault until it reaches its cap of 215 at vault 24. The mazes also gain extra openings as you go deeper, up to vault 12, so there are more loops and alternative routes.
The lamp is also how far you can see: about five cells down a straight corridor at full lamp, four at half, three when the warning sounds at 28%, and two near the end. A dim lamp makes exploring more expensive, because you must walk further to learn what a corridor holds.
Where things are placed
These rules come straight from how every maze is built, and they are the most useful thing to know.
- The landing is as far as possible from the start. It sits at the cell that takes the most steps to walk to. If you are near the start, you are not near the exit.
- Doors sit along the route to the landing, spaced out. Each one truly blocks the way. You cannot walk around a locked door, so do not waste light looking for a bypass.
- Doors come in order. With several doors, the amber door is the one closest to the start along the route, then cyan, then violet.
- Each key is on your side of its door. You can always reach the next key with the doors you have already opened. The game picks the reachable cell furthest from the direct route, so keys sit at the end of side branches, not on the main line.
- Oil flasks are only in dead ends. Not every dead end has one, but no flask is ever anywhere else.
- Crates and barrels never block a cell.
Coins
| Source | Coins |
|---|---|
| Each key picked up | 12 |
| Each oil flask | 4 |
| Reaching the landing | 25, plus 5 for each vault after the first |
| Lamp left at the landing | 0.35 per unit |
So vault 1 pays 25 for the landing and vault 7 pays 55. Lamp left over is worth most at the landing, because the next vault refills it for free anyway. Coins buy only flame colours, from 120 to 380, and nothing changes how far the lamp reaches.
Is a flask worth the walk?
A flask gives 38 units of lamp, but never past the vault's maximum. The walk to it and back is the cost. If the round trip is shorter than 38 steps and your lamp has at least 38 units of room, you come out ahead on light. Every unit you bring to the landing is also worth 0.35 coins, plus 4 for the flask itself. When your lamp is nearly full, leave the flask for later: you can come back once you have spent some light.
A plan for each vault
- Turn a full circle before your first step. It is free and shows every open corridor from the start.
- Find the amber door early. The route to the landing runs through it, so once you have seen it, you know roughly where the main line goes. Corridors that lead away from that line are the side branches.
- Favour the deepest side branches. Each key sits at the reachable cell furthest from the main route, so the key is usually at the end of the longest detour on your side of its door, not in a short stub next to the route.
- Use the map at every junction. It shows every cell you have seen, plus doors, keys you have not picked up and the landing. Blank areas are unexplored. Flasks are not drawn on it, so remember dead ends you have seen.
- Walk in short presses. Holding forward keeps stepping, and every extra step into a wall-facing dead end is light gone.
Going deeper or leaving
Going deeper is a fresh maze with a full lamp, and every vault pays more for the landing than the last. The risk is losing everything you are carrying. Some sensible rules:
- If you reached the last landing with very little lamp left, you are probably exploring inefficiently. Bank before the mazes get bigger.
- Vault 7 is the step up to the full 13 x 13 maze with three doors. It is a natural point to bank a good haul.
- Never end a run from the pause menu to save coins. It loses them the same way running dark does.
Common mistakes
- Backing up to "undo" a step. Stepping back costs light too.
- Expecting to scout past a locked door. Bumping into one costs no light, but a shut door also blocks your view, so you learn nothing about what lies behind it.
- Chasing the landing before you hold the keys. Every door on the way to it is locked until you do, so steps spent heading there early are usually steps you walk twice.
- Turning away from a corridor after one glance on a low lamp. At the end of a vault you see only two or three cells, so a key or flask can be just past what you saw.
If you're stuck
If you cannot find a key, check the map for cells you saw but never stood in, especially at the ends of corridors your lamp only just reached, and go there by the shortest known path.
Ready to try it?Corridor Vault is free and runs in your browser.Play now